
Desserts
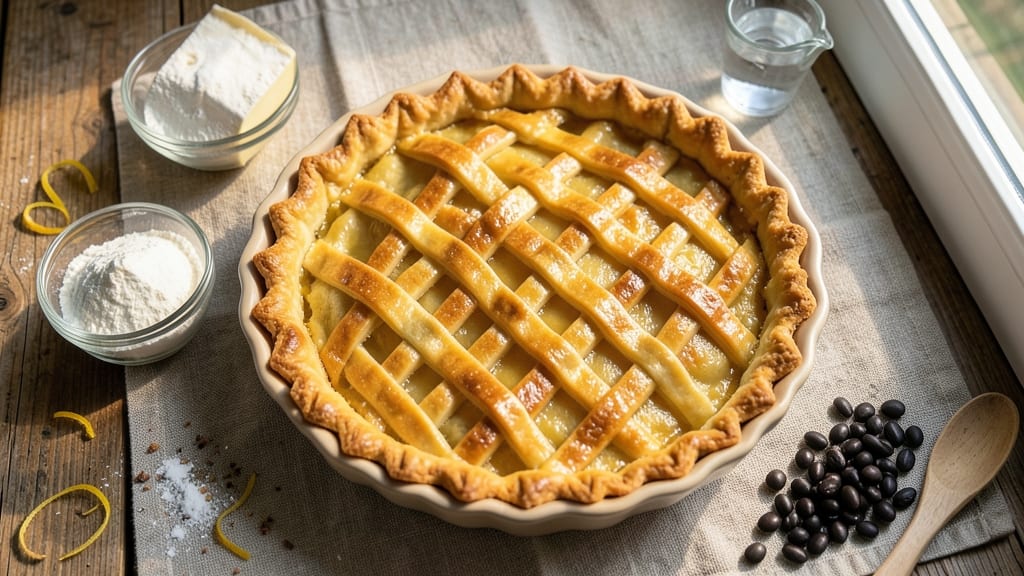
A pre-baked pie shell transforms any dessert from good to extraordinary—crisp, golden, and structurally perfect before the filling even goes in.
This recipe eliminates the frustration of soggy bottoms and uneven baking by mastering the art of blind baking, a technique that ensures your crust holds its shape under even the heaviest fruit fillings or custards.
The secret lies in a foolproof dough recipe with the right fat-to-flour ratio and proper chilling, followed by precise rolling and baking with pie weights or dried beans. Unlike store-bought crusts, this homemade version delivers a flaky, tender texture with a subtle buttery richness that sets it apart.
Even beginners can achieve professional results with these step-by-step instructions.
What you’ll end up with is a perfectly golden crust that stays crisp at the edges while remaining tender inside—no more cracking, no more shrinkage. This method works for both classic fruit pies and savory tarts, giving you a reliable foundation for any filling you choose.
The best part? Once you master it, you’ll never buy pre-made crusts again.
Ready to elevate your baking game? This recipe includes tips for rolling without tears, blind-baking techniques, and how to handle fillings like a pro. Let’s get started on a crust that will make your desserts shine.
Ingredients for pre baked pie shell
Golden crust perfection starts with these eight essential ingredients—flour, butter, and patience make all the difference.
| Ingredient | Amount | Notes |
|---|---|---|
| All-Purpose Flour 🌾 | 2 ½ cups | Sifted for even texture |
| Unsalted Butter 🧈 | 1 cup | Cold, cubed for flakiness |
| Ice Water 💧 | ⅓ cup | Chilled for tender dough |
| Diamond Crystal Kosher Salt 🧂 | ½ tsp | Fine grain preferred |
| Pie Weights or Dried Beans 🌾 | 1 cup | For blind baking support |
| Granulated Sugar 🍚 | 1 tbsp | For egg wash |
| Large Eggs 🥚 | 1 whole | Beaten for egg wash |
| Heavy Cream or Whole Milk 🥛 | 1 tbsp | For egg wash richness |
The butter-to-flour ratio is everything here. Use European-style butter like Plugrá or French-style—they have higher fat content for that signature flakiness. If your grocery store only carries regular butter, chill it for 45 minutes first so it stays firm when cutting into the flour. For flour, King Arthur or Gold Medal brands are ideal—they absorb moisture evenly. The ice water is non-negotiable; room-temperature water makes the dough tough. Pro tip: wrap your dough ball in plastic and refrigerate for at least 2 hours—this prevents cracking when rolling.
No pie weights? Dried black beans or rice work perfectly—they’re cheap, reusable, and absorb moisture like a dream. Running short on butter? Shortening like Crisco works too, though it’ll be slightly less flaky. The egg wash is where you can get fancy: add a pinch of turmeric for extra golden color or a splash of vanilla for subtle flavor. For extra crispiness, brush the baked shell with a little melted butter before adding filling. And if you’re making a savory tart, skip the sugar in the egg wash—just use milk and a pinch of salt.
Store unbaked dough in the fridge for up to 3 days, wrapped tightly in plastic. Once baked, keep the shell at room temperature in an airtight container for 2 days—it reheats beautifully in a 350°F oven for 5-8 minutes. For longer storage, freeze the unbaked shell (before blind baking) for up to 2 months
Why You'll Love This Recipe
- No-Fuss Foundation: I swear by this for when I’m too tired to fuss—just mix cold butter, flour, and ice water until it holds together like dough should. No rolling pins required, no stressing over perfect edges.
- Butter’s Golden Edge: That crisp, flaky crust? Pure magic from cold butter cut into the flour until it looks like coarse sand. The moment it browns under the weights? Worth every second.
- Weeknight Hero: I make a batch on Sundays and freeze them—perfect for last-minute pies, potlucks, or when I suddenly remember I promised dessert. Just thaw, fill, and bake.
- Pantry Staple Power: Flour, butter, salt—ingredients I already have. No specialty items, no extra shopping. And if I forget pie weights? Dried beans work just as well. Reliable, simple, and always saves me.
Step-by-step instructions for a foolproof pre-baked pie shell
Here's how to create a sturdy, golden crust that holds its shape and delivers perfect texture every time.
Mix the Dough for Maximum Flakiness
In a large mixing bowl, combine the 2.5 cups all-purpose flour and 0.5 teaspoon Diamond Crystal kosher salt. I always sift the flour first—this prevents lumps and ensures even distribution of salt throughout the dough. Create a well in the center and add the 1 cup cold, cubed unsalted butter.
Using a pastry cutter or your fingers, work the butter into the flour until you achieve pea-sized crumbs with some flour still visible. This texture is crucial—it creates those beautiful flaky layers when baked. Overworking the butter will develop gluten and make the crust tough. If the mixture seems too dry, add 1 tablespoon of ice water at a time until it just comes together when pressed.
Form and Chill the Dough
Turn the dough onto a lightly floured surface and gently press it into a disk about 1 inch thick. Wrap it tightly in plastic wrap and refrigerate for at least 2 hours—this resting period is essential. It allows the gluten to relax and the butter to firm up, preventing shrinkage during baking. For best results, chill overnight if possible.
I press down gently on the dough during the first minute of chilling—this prevents it from curling and ensures even thickness. The cold dough should feel firm but still pliable when you test it. If it feels too soft, return it to the fridge for another 30 minutes before proceeding.
Roll Out the Dough Without Tears
On a lightly floured surface, roll the chilled dough into a 12-inch circle—about ⅛-inch thick. I use a rolling pin with guides to maintain consistent thickness. Rotate the dough a quarter turn after every few rolls to prevent uneven thickness. If the dough resists rolling, let it rest for 10 minutes at room temperature before continuing.
Transfer the rolled dough to a 9-inch pie dish, gently easing it into the bottom and up the sides. Trim any excess dough hanging over the edge with a sharp knife. The dough should fit snugly but not stretch—if it tears, patch it with leftover dough scraps. The key here is patience; don't force the dough or it will shrink during baking.
Blind Bake for Perfect Support
Preheat your oven to 375°F. Line the chilled pie shell with parchment paper or foil, then fill it completely with the 1 cup pie weights or dried beans. This prevents the bottom from puffing up during baking. Bake for 15 minutes, then remove the weights and parchment, and bake for another 5-8 minutes until the edges are light golden brown.
Watch carefully during the last few minutes—you want the crust to be fully set but not darken. If the edges brown too quickly, cover them loosely with aluminum foil. The shell should be firm to the touch and hold its shape when gently pressed. For extra insurance, I sometimes brush the bottom with a little egg wash (1 whole large egg beaten with 1 tablespoon heavy cream or whole milk) before blind baking.
Finish with the Perfect Egg Wash
Once the pie shell is fully baked, remove it from the oven and let it cool for 10 minutes. In a small bowl, whisk together the 1 whole large egg, 1 tablespoon granulated sugar, and 1 tablespoon heavy cream or whole milk. Brush this mixture generously over the entire surface of the crust, including the sides.
Return the pie shell to the oven and bake for 3-5 minutes until the top develops a deep golden brown color. This final step creates that beautiful bakery-style finish while keeping the crust tender. The sugar in the wash caramelizes slightly, adding subtle sweetness that complements both sweet and savory fillings. Let the crust cool completely before adding your filling—this prevents soggy bottoms.
Pro Tips For Making Pre Baked Pie Shell
- Chill the Butter First: Take that cold butter straight from the fridge—don’t let it sit out even for a minute. I used to skip this, and my shells always ended up greasy or tough. Cold butter creates flaky layers, while warm butter just melts into mush.
- Use Ice Water (Not Cold): Pour water over ice and let it melt just enough to use—it should be close to freezing. Regular cold water won’t cut the butter properly, and your dough will turn out gummy. Sounds fussy, but it’s the thing that matters most for a crisp shell.
- Pre-Bake at 375°F: Skip the 425°F rush—375°F is the sweet spot for even browning without burning. I learned this the hard way after one shell turned into a sad, uneven brick. Use pie weights (or dried beans) to weigh it down, but don’t overcrowd the oven.
- Blind-Bake with Parchment: Line the shell with parchment paper before adding weights—it’s easier to remove and prevents sticking. I was skeptical until I tried it: no scrubbing, no stress, and the bottom stays perfectly crisp. (Yes, even if you’re impatient like me.)
Flavor customization for this dish
Sweet & Spiced
For a warm, aromatic twist, add 1 teaspoon cinnamon and ½ teaspoon nutmeg to the dough mixture. These spices create a cozy, almost custard-like flavor that pairs beautifully with fruit fillings like apple or pear.
I like to brush the baked shell with a mix of 1 tablespoon melted butter and ½ teaspoon vanilla extract before adding filling—it adds an extra layer of warmth. 🌶️
Herb-Infused
Swap out the salt for ½ teaspoon dried thyme or rosemary and reduce the flour to 2.25 cups to maintain texture. This works wonderfully for savory tarts with goat cheese or caramelized onion fillings.
For a fresh twist, add 2 tablespoons finely chopped fresh herbs like parsley or chives to the dough before rolling. The aroma infuses beautifully into the butter during baking.
Nutty Crunch
Fold ½ cup chopped walnuts or pecans into the dough after mixing the butter and flour. This adds a delightful crunch to every bite, especially when paired with creamy fillings like pumpkin or sweet potato.
Toast the nuts lightly in a dry pan for 3-4 minutes before adding to enhance their flavor. For extra richness, brush the baked shell with 1 tablespoon honey before adding filling.
Citrus Zest
Add 1 teaspoon lemon or orange zest to the dough mixture for a bright, refreshing flavor. This works especially well with berry fillings or custards. The zest brightens the butter flavor and adds a subtle tang that cuts through richer fillings.
I recommend using organic citrus to avoid bitterness from pesticides. For a decorative touch, sprinkle extra zest on top before baking.
Everything Bagel
Create a savory, everything-bagel-inspired crust by adding 2 tablespoons poppy seeds, 1 tablespoon sesame seeds, 1 tablespoon dried onion flakes, and 1 teaspoon garlic powder to the dough. This version shines with fillings like smoked salmon, cream cheese, or roasted vegetables.
For extra flavor, brush the baked shell with a mix of 1 tablespoon olive oil and ½ teaspoon smoked paprika before adding filling.
Whiskey or Bourbon
Replace 1 tablespoon of ice water with the same amount of whiskey or bourbon for a rich, caramelized flavor. This works particularly well with fruit pies like cherry or peach. The alcohol burns off during baking, leaving behind deep, toasty notes.
I recommend using high-quality bourbon like Maker's Mark or a good whiskey like Woodford Reserve for the best results. 🥃
Nutrition facts
Frequently asked questions
Why do I need to blind bake my pie shell?
Blind baking prevents soggy bottoms by removing moisture before adding filling. The 15-minute pre-bake with weights ensures the crust sets properly, especially for wet fillings like fruit or custard. Without this step, steam from the filling can make your crust mushy instead of crisp.
Can I make this crust ahead of time?
Yes! The unbaked dough keeps for 3 days in the fridge, wrapped tightly. For longer storage, freeze the unbaked shell (before blind baking) for up to 2 months. Thaw overnight in the fridge—never at room temperature—to maintain texture. Pre-baked shells reheat beautifully in a 350°F oven for 5-8 minutes with a pie weight on top.
What if my crust shrinks during baking?
Shrinkage usually happens when dough isn't chilled enough or handled too much. Always refrigerate for at least 2 hours and avoid overworking the butter. If your crust shrinks slightly, press it gently into the dish before blind baking—it'll still hold fillings well. For stubborn cases, patch with extra dough scraps before baking.
How do I prevent cracks in the crust?
Cracks form from temperature shock or uneven baking. Let the crust cool for 10 minutes after blind baking before adding filling, and avoid placing hot fillings directly on it. For extra insurance, brush the baked shell with a thin layer of egg wash before filling—this creates a barrier against moisture. Also, ensure your oven rack is in the middle position for even heat.
Can I use this crust for savory dishes?
This recipe works perfectly for quiches, tarts, or savory pies. For a richer flavor, brush the baked shell with olive oil instead of butter, and add herbs like thyme or rosemary to the dough. The same blind-baking technique prevents sogginess with creamy fillings like cheese or custard.