
Desserts
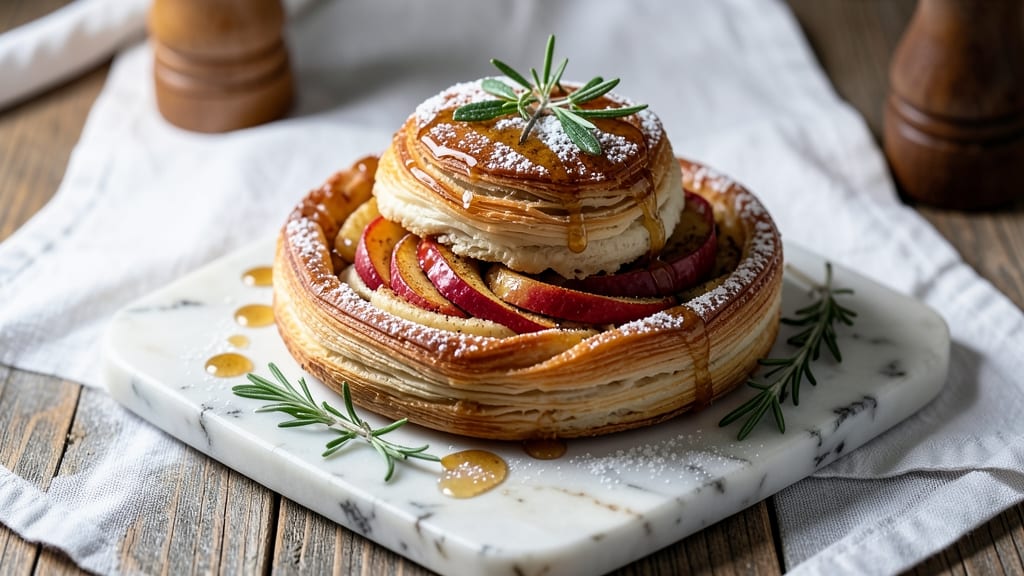
This apple pie danish recipe transforms a classic dessert into a showstopping pastry with flaky layers and warm spiced apple filling. The secret lies in combining a tender yeast dough with a caramelized apple mixture, creating a balance of crispy edges and soft centers that rivals any bakery creation.
I developed this recipe after years of perfecting the art of Danish pastries, ensuring every bite delivers that perfect harmony of buttery dough and aromatic apple.
The foundation of this recipe is a foolproof yeast dough that develops rich flavor during a slow rise, while the apple filling gets its depth from cinnamon, nutmeg, and a touch of brown sugar for caramelization.
What sets this apart is the way the filling is layered between the dough—creating pockets of spiced goodness that burst with every bite. The result is a restaurant-quality dessert that looks impressive yet comes together with straightforward techniques.
By the time it emerges from the oven, you'll have a golden, flaky danish with a lattice-like pattern that adds visual appeal while keeping the filling moist.
The aroma alone will have everyone gathering around the kitchen, and the first bite delivers that perfect combination of tender dough, caramelized apples, and warm spices. This is the kind of dessert that feels special enough for holidays but simple enough for a weeknight treat.
Serve it warm with a dusting of powdered sugar or a drizzle of cream cheese glaze for that extra touch of elegance. The versatility of this recipe means you can adjust the spice levels or even add a streusel topping if you prefer.
Let's get started on creating this showstopping dessert that will impress any crowd.
Ingredients for apple pie danish
Buttery dough meets caramelized apples in this restaurant-quality dessert with flaky layers.
| Ingredient | Amount | Notes |
|---|---|---|
| All-Purpose Flour 🌾 | 4 cups | For tender yeast dough |
| Granulated Sugar 🍚 | ¼ cup | For dough sweetness |
| Instant Yeast 🍞 | 0.03 oz | Or 2.25 tsp (1 packet) |
| Unsalted Butter 🧈 | ½ cup | Cold, cubed for dough |
| Large Eggs 🥚 | 1 whole | Room temperature |
| Milk 🥛 | ½ cup | Warm (110°F) |
| Salt 🧂 | ½ tsp | Kosher preferred |
| Red Apples 🍎 | 4 medium | Peeled, cored, diced (about 4 cups) |
| Brown Sugar 🍚 | ½ cup | Packed for caramelization |
| Ground Cinnamon 🌿 | 2 tsp | Freshly ground preferred |
| Ground Nutmeg 🌿 | ½ tsp | Freshly grated preferred |
| Lemon Juice 🍋 | 1 tbsp | Freshly squeezed |
| Powdered Sugar 🍚 | ¼ cup | For dusting |
| Heavy Cream 🥛 | ¼ cup | For optional glaze |
The flaky layers start with cold butter—never skip chilling the dough. King Arthur or Gold Medal flour works best for that tender crumb. For yeast, Fresh & Easy brand (found in most grocery stores) is reliable, but check the expiration date—old yeast kills flavor. Apples are non-negotiable here. Honeycrisp or Granny Smith hold up best to baking, but any crisp variety works. Peel and dice them uniformly—about 1/4-inch cubes—so they caramelize evenly. The brown sugar should be packed, not scooped loosely, for that deep caramel flavor.
No cinnamon? Pumpkin pie spice at half the amount works in a pinch, though it lacks that classic apple-pie warmth. Nutmeg is tricky—if you only have whole nutmeg, grate it fresh (about 1/8 tsp per 1/2 tsp ground). For the dough, butter substitutes like vegan butter (for dairy-free) lose some flakiness, but work if you're avoiding dairy. The lemon juice prevents browning—skip it if you prefer a darker filling. For a streusel topping, mix 0.5 cup flour, 0.25 cup brown sugar, and 0.25 cup cold butter, then sprinkle over the filling before baking.
Dough keeps 2 days wrapped in the fridge or 3 months frozen (thaw overnight). Prepped filling holds 1 day in the fridge—caramelize it just before layering for best texture. Baked danishes reheat beautifully: 5 minutes at 350°F wrapped in foil restores that fresh-from-oven warmth. Store leftovers 3 days at room temperature (covered) or 1 week refrigerated. Freeze baked danishes for 2 months—reheat from frozen with 10 extra minutes at 325°F.
Why You'll Love This Recipe
- No Yeast Nightmare: I swear, this dough comes together faster than my coffee brews—just mix, fold, chill. No kneading, no waiting for hours, just 10 minutes of hands-on time before you’re done.
- Buttery Spice Bomb: That caramelized sugar and butter filling? It’s like biting into a warm hug—sweet, rich, and just crisp enough at the edges. Honestly, the first time I made it, I ate half the batch straight from the pan.
- Breakfast or Dessert: Serve it warm with a drizzle of honey for a weekend brunch, or pack it cold for school lunches. My kids beg for it both mornings and after dinner—no judgment here.
- Budget-Friendly Luxury: Flour, sugar, butter, eggs—these are pantry staples that won’t break the bank. Plus, the dough doubles easily, so you’ll have leftovers that taste even better the next day. (Yes, even on a Tuesday night.)
Step-by-step instructions for apple pie danish
Master the art of flaky layers with this professional technique for homemade apple pie danish.
Prepare the Yeast Dough for Maximum Flakiness
In a stand mixer fitted with the dough hook attachment, combine the 4 cups all-purpose flour, 0.5 teaspoon salt, and 0.03 ounce instant yeast. Mix on low speed for 30 seconds to distribute the yeast evenly through the flour. This creates the perfect foundation for tender layers.
In a separate bowl, melt the 0.5 cup unsalted butter until just liquid but not hot. Add the 0.25 cup granulated sugar, 1 whole large egg, and 0.5 cup warm milk (110°F) to the melted butter mixture. With the mixer running on low speed, gradually pour the wet ingredients into the flour mixture. Increase speed to medium and mix for 4-5 minutes until the dough comes together and pulls away from the sides of the bowl.
Transfer the dough to a lightly floured surface and knead gently for 1-2 minutes just until smooth. This minimal kneading preserves gluten development for tender, not tough, layers. Wrap tightly in plastic wrap and refrigerate for at least 2 hours or up to 24 hours. The cold rest is crucial for developing flavor and creating those signature flaky layers.
Prepare the Spiced Apple Filling
While the dough rests, peel, core, and dice the 4 medium red apples into ¼-inch pieces. Toss them immediately with 1 tablespoon freshly squeezed lemon juice to prevent browning. This acidity also enhances the natural sweetness of the apples.
In a medium bowl, combine the diced apples with 0.5 cup packed brown sugar, 2 teaspoons ground cinnamon, and 0.5 teaspoon ground nutmeg. Mix gently but thoroughly to distribute the spices evenly. The filling should look moist but not soupy—this ensures proper texture when baked. Let the mixture sit at room temperature for 15 minutes to allow the flavors to meld slightly.
Roll and Layer the Danish Dough
On a lightly floured surface, roll the chilled dough into a 12x15-inch rectangle, about ⅛-inch thick. I use a rolling pin with even pressure to maintain consistent thickness throughout. If the dough resists rolling, let it rest for 5 minutes at room temperature to soften slightly.
Spread the apple filling evenly over the rolled-out dough, leaving a ½-inch border around the edges. This prevents the filling from oozing out during baking. Fold the dough in thirds like a letter, then roll it up tightly from the long side to form a log. Seal the seam by pressing gently with your fingers.
Shape and Proof the Danish
Using a sharp serrated knife, cut the log into 6 equal pieces. I find it easiest to make ⅛-inch deep cuts at 2-inch intervals to create clean separation. Gently twist each piece to form a crescent shape, then place them on a parchment-lined baking sheet, 1 inch apart. This spacing allows for even browning.
Cover the shaped danishes loosely with plastic wrap and let them proof at room temperature for 1 hour or until they've risen about 50%. The dough should look slightly puffy and feel springy to the touch. Avoid over-proofing—they should still hold their shape when gently pressed.
Bake to Golden Perfection
Preheat your oven to 375°F. Brush the tops of the danishes with a light coating of 0.25 cup heavy cream for a glossy finish and enhanced browning. Bake for 20-25 minutes until the tops are deep golden brown and the internal temperature reaches 190°F. The edges should be crisp while the centers remain tender.
For that signature danish glaze, whisk together the 0.25 cup powdered sugar with 1-2 teaspoons milk until smooth. Drizzle generously over the warm danishes immediately after removing from the oven. Let them cool for 10 minutes before serving to allow the glaze to set slightly. The contrast of warm, spiced apple filling with the crisp, flaky layers makes every bite irresistible.
Pro Tips For Making Apple Pie Danish
- CHILL THE DOUGH: Don’t rush the first rise—let that yeast work its magic in a cool spot (around 68°F) for 1.5–2 hours. I learned this the hard way when I stuck it in the fridge too soon; the butter stayed too cold, and the layers never developed properly. Patience here makes all the difference in that flaky, buttery texture.
- CUT BUTTER IN SMALL: Use your fingers or pastry cutter to work the cold butter into the flour until it’s pea-sized, not almond-sized. I used to overwork it, and the dough turned gummy. Keep those butter pieces firm but just soft enough to press into the dough—this guarantees those melt-in-your-mouth layers when baked.
- SKIP THE OVERMIXING: Once the dough comes together, handle it like it’s made of glass. Overmixing activates the gluten, and you’ll end up with a tough, chewy danish instead of the tender, pillowy one you want. Just fold it a couple of times until it’s smooth—no need to knead like bread dough.
- USE ROOM-TEMP EGGS: Cold eggs from the fridge mix unevenly and can weaken the dough’s structure. Let them sit out for 30 minutes before adding them to the wet ingredients. Trust me, your danish will hold its shape better during baking, and the filling won’t leak out like a sad, runny mess.
Dietary considerations for this apple pie danish
Gluten-Free Adaptations
For a gluten-free version, swap the all-purpose flour for a 1:1 gluten-free baking flour blend like King Arthur Measure for Measure or Bob's Red Mill 1-to-1. Add 1 teaspoon xanthan gum to the dough to mimic gluten's structure.
The yeast dough will be slightly less elastic, so handle it gently when rolling. Chill the dough an extra 30 minutes to prevent sticking to surfaces. 🌾
Dairy-Free Options
Replace the ½ cup unsalted butter with vegan butter like Miyoko's or Earth Balance for flakiness, though the layers won't be quite as crisp. Use unsweetened almond milk instead of dairy milk, and swap heavy cream for full-fat coconut cream in the glaze.
The flavor remains rich, but texture may be slightly denser.
Lower Sugar Versions
Reduce the brown sugar in the filling to ¼ cup and add 1 teaspoon vanilla extract to enhance sweetness naturally. Use unsweetened applesauce (¼ cup) in the dough to replace half the granulated sugar.
The result is a subtly sweet danish with balanced flavors. Pair with a lemon glaze (powdered sugar + lemon juice) for extra zing.
Nut-Free Considerations
This recipe is naturally nut-free, but always check labels on ingredients like brown sugar or vanilla extract for cross-contamination warnings. If making a streusel topping, use oats certified gluten-free (like Bob's Red Mill GF Oats) and omit nuts entirely. The apple filling remains safe for nut allergies as written.
Vegan Substitutions
For a fully vegan danish, use vegan butter and flax eggs (1 tbsp ground flaxseed + 3 tbsp water per egg). Replace honey with maple syrup in the filling, and use coconut yogurt instead of heavy cream for the glaze.
The texture will be slightly denser but still delicious—perfect for plant-based bakers! 🌱
Nutrition facts
Frequently asked questions
Can I make this apple danish with puff pastry instead of yeast dough?
Yes! Replace the yeast dough with 1 sheet of frozen puff pastry, thawed according to package instructions. Roll it out to 12x15 inches, spread the apple filling, fold and roll as directed, then cut into pieces. Bake at 400°F for 18-20 minutes instead of 375°F. The result will have a lighter, crispier texture but less flaky layers.
How do I prevent the filling from leaking during baking?
Keep a ½-inch border of dough around the edges when spreading filling, and don't overfill. For extra insurance, brush the edges with egg wash before shaping. If using a streusel topping, press it firmly against the dough to create a seal. The filling should be moist but not soupy—drain any excess liquid from diced apples before mixing.
Can I make this danish ahead of time?
Shape the danishes, proof, and bake them 1 day ahead. Store at room temperature in an airtight container. Reheat in a 350°F oven for 5-7 minutes wrapped in foil to restore freshness. For freezing, bake first, then freeze completely. Reheat from frozen at 325°F for 15-20 minutes with foil covering the bottom half.
What's the best way to store leftovers?
Keep danishes at room temperature in a covered container for 2 days or refrigerate for up to 1 week. For longer storage, freeze baked danishes in a single layer before transferring to a bag. Reheat individually in the microwave for 15 seconds or in the oven as above. The texture remains best when reheated briefly—microwaving too long makes them gummy.
How can I make this danish look more impressive for serving?
Create a lattice pattern by cutting the dough into strips after shaping, then weaving them over the filling like a pie crust. For extra flair, dust with powdered sugar or drizzle with a cream cheese glaze** (mix 4 oz softened cream cheese with 1 cup powdered sugar and 1 tbsp milk). Arrange on a decorative platter with fresh apple slices or cinnamon sticks for garnish. Serve warm for maximum aroma appeal!