
Desserts
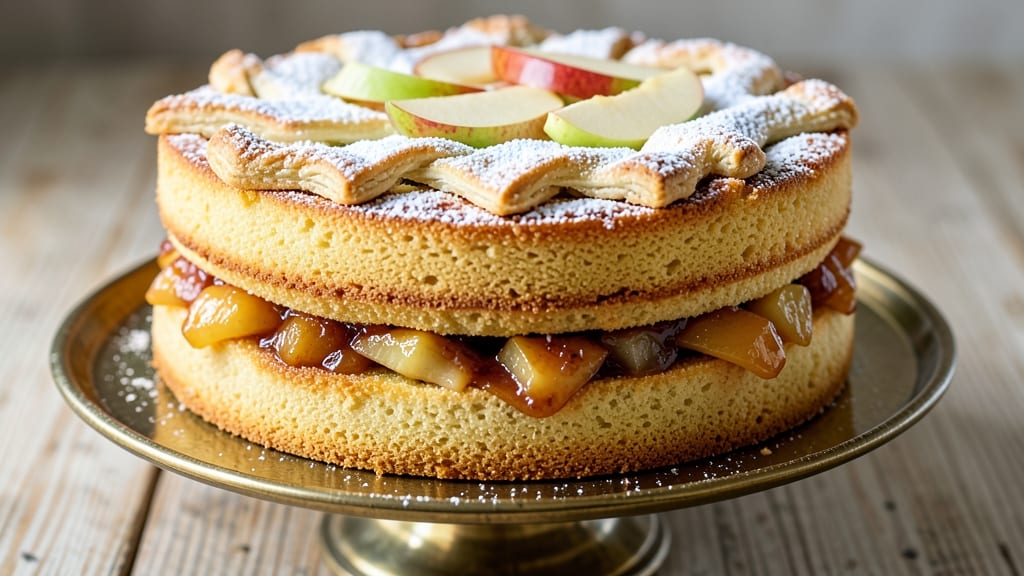
This apple pie cake recipe from scratch brings back childhood memories of Grandma’s kitchen—warm cinnamon, tender apples, and layers that taste like a hug. 💛 The secret lies in a buttery shortbread crust that stays crisp while supporting layers of spiced apple filling and moist cake.
I’ve perfected this recipe over years of baking, ensuring every slice delivers that perfect balance of crunch, creaminess, and autumnal flavor.
What makes this recipe special is the combination of a classic pie filling with cake-like layers, creating a dessert that’s both nostalgic and impressive. The apples are cooked just until tender, holding their shape while releasing natural juices that keep the cake moist.
A simple vanilla custard layer ties everything together, adding richness without overpowering the apple-cinnamon flavors.
By the time you pull this cake from the oven, you’ll have golden layers of shortbread crust, spiced apple filling, and cake that’s tender yet sturdy enough to slice cleanly.
The aroma alone will have everyone gathering around the table, and the first bite will transport you straight to Grandma’s kitchen. This recipe is foolproof, delivering restaurant-quality results with just a few simple techniques.
Perfect for holidays, family gatherings, or a cozy weekend treat, this apple pie cake is versatile enough to adapt with seasonal fruit or spices. Let’s get baking—your kitchen will smell like autumn in no time.
Ingredients for apple pie cake recipe from scratch
Buttery crust, spiced apples, and layers that taste like autumn nostalgia—just 13 ingredients.
| Ingredient | Amount | Notes |
|---|---|---|
| All-Purpose Flour 🌾 | 3 ½ cups | Sifted for light texture |
| Unsalted Butter 🧈 | 2 cups | Cold, cubed for crust |
| Granulated Sugar 🍚 | 1 ½ cups | Divided for crust/cake |
| Large Eggs 🥚 | 4 whole | Room temperature |
| Vanilla Extract 💧 | 2 tsp | Pure, not imitation |
| Baking Powder 🧂 | 1 tbsp | Aluminum-free preferred |
| Salt 🧂 | ½ tsp | Fine sea salt |
| Red Apples 🍎 | 6 medium | Honeycrisp or Granny Smith |
| Ground Cinnamon 🌿 | 2 tbsp | Freshly ground preferred |
| Lemon Juice 🍋 | 2 tbsp | Freshly squeezed |
| Heavy Cream 🥛 | 1 ½ cups | Full-fat for custard |
| Cornstarch 🌾 | 2 tbsp | For thickening custard |
| Brown Sugar 🍚 | ½ cup | Packed, for filling |
The apples are everything here. Honeycrisp or Granny Smith are my go-tos—they hold shape while cooking but still get tender. Walmart or Trader Joe's usually have these in season, but any crisp apple works. Peel and core them first, then slice into even 1/4-inch pieces. If you're using pre-sliced apples from the bag, give them a quick rinse—they're often waxed. For extra flavor, toss the sliced apples with 1 tbsp of the brown sugar before baking.
No vanilla extract? Vanilla bean paste works too, or even a scraped vanilla bean if you're feeling fancy. Running short on cornstarch? Arrowroot powder at the same amount thickens just as well. The heavy cream is non-negotiable for that silky custard—half-and-half works in a pinch, but it won't be as rich. For the crust, don't skip the cold butter cubes. Pulse them in the food processor with the flour until pea-sized for that perfect crumb. And if you're making this ahead, make the crust first—it keeps best in the fridge for up to 3 days.
This cake keeps beautifully—3 days at room temperature wrapped tightly, or 1 week in the fridge if you want to play it safe. The custard layer is the star, so if you're freezing it, assemble everything except the custard, then bake it fresh after thawing. Slice it warm for the best texture—those apples are juicy and the crust stays crisp. Leftovers? Toasted pecans on top turn it into a whole new dessert. Trust me, the second slice is always better.
Why You'll Love This Recipe
- Here’s what sold me: this cake costs next to nothing to make, but it feeds a crowd. A single batch gives me six servings, and the leftovers? They keep for days without drying out. Plus, you’re using pantry staples—no specialty ingredients to break the bank.
- No Mixer Needed: I swear by this recipe because it’s all about the creaming method—just a bowl and a wooden spoon. The butter and sugar get whipped smooth by hand (or with a hand mixer if you’re impatient), and the flour folds in like butter. No electric gadgets, no fuss, just pure, satisfying texture.
- Taste Like Autumn: That buttery crumb with warm cinnamon-spiced apples? It’s the kind of flavor that makes you pause mid-bite. The vanilla extract ties it all together, giving it this cozy, nostalgic sweetness that’s ridiculously better than store-bought.
- Double Duty Cake: Slice it for breakfast with a dollop of whipped cream, or serve it at a picnic with lemon glaze. Honestly, I’ve even used leftover pieces to make French toast—crispy edges, caramelized apples, chef’s kiss. One cake, endless ways to enjoy it.
Step-by-step instructions for apple pie cake from scratch
Here's how to build layers that taste like grandma's pie—crisp crust, spiced apples, and creamy custard.
👨🍳 Step 1: Make the Crust and Cake Layers
In a large bowl, whisk together the 3.5 cups All-Purpose Flour, 1 tbsp Baking Powder, and 0.5 tsp Salt. Cut in the 2 cups Unsalted Butter (cold) using a pastry cutter or fork until the mixture resembles coarse crumbs with pea-sized butter pieces. Sprinkle in 0.5 cup Granulated Sugar and toss until evenly distributed.
Divide the dough into three equal portions. Press one portion into a 9-inch round pan (bottom crust), one into a 9-inch pie plate (top crust), and reserve the third for the cake layer. Chill all crusts for 30 minutes while you prepare the filling. This ensures they hold their shape when baking.
🍳 Step 2: Prepare the Apple Filling
Peel, core, and slice the 6 medium Red Apples into ¼-inch thick slices. Toss them with 2 tbsp Lemon Juice, 2 tbsp Ground Cinnamon, and 0.5 cup Brown Sugar in a large bowl. Let sit for 10 minutes—this softens the apples slightly and lets the flavors meld. The filling should look glossy and fragrant.
Arrange half the apple slices in the 9-inch pie plate (for the bottom layer) and the rest in the 9-inch round pan (for the top layer). Press down gently to create an even layer. This distribution ensures both layers get perfectly baked.
🥘 Step 3: Bake the Crusts and Apples
Preheat oven to 375°F. Bake the bottom crust in the pie plate for 12 minutes until lightly golden. Remove and fill with half the apple slices. Bake for another 10 minutes until apples soften but don't break down. Repeat with the top crust in the round pan.
Here's the thing—don't overbake. You want the apples tender but still holding their shape. If the crust edges brown too quickly, cover them loosely with foil after the first 8 minutes. The filling should look bubbly and fragrant when done.
👨🍳 Step 4: Prepare the Cake and Custard
In a separate bowl, whisk together the remaining 1 cup Granulated Sugar, 4 whole Large Eggs, and 2 tsp Vanilla Extract. Gradually fold in the remaining dough portion until just combined—don't overmix. Spread this cake batter over the baked apples in the pie plate.
For the custard, warm 1.5 cups Heavy Cream in a saucepan over medium heat until steaming. In a separate bowl, whisk 2 tbsp Cornstarch with 0.25 cup Granulated Sugar. Slowly pour the warm cream into the sugar mixture while whisking vigorously. Return to the pan and cook for 3-5 minutes until thickened and glossy. Let cool slightly before pouring over the cake layer.
🔥 Step 5: Assemble and Bake to Perfection
Place the top crust over the pie plate, pressing gently to seal. Brush the crust edges with water and crimp with a fork for a rustic look. Bake at 350°F for 35-40 minutes until the crust is golden and the custard is set but still slightly jiggly in the center.
Let cool for 1 hour before slicing—this gives the custard time to fully set. The cake should have a tender crumb, the apples perfectly spiced, and the custard creamy yet firm. Serve warm with vanilla ice cream for the ultimate dessert experience.
Pro Tips For Making Apple Pie Cake Recipe From Scratch
- CHILL THE BUTTER FIRST: Mixing cold butter into the flour creates flaky layers that make this cake actually taste like pie crust—no one expects a cake to have that buttery crunch. Take the butter out of the fridge 15 minutes before you start, then cut it into ½-inch cubes. (Yes, even if you’re impatient like me.)
- CREAM THE SUGAR WELL: I used to rush this step, and the cake turned out dense. Beat the butter and sugar until the mixture is pale yellow and light, about 3-4 minutes with an electric mixer. Stop when you can drag a spoon through it and leave clean lines—this incorporates air that keeps the cake tender.
- DON’T OVERMIX THE BATTER: Once you add the eggs and vanilla, mix just until combined—lumpy is fine. Overworking the batter develops gluten, which makes the cake tough. Fold in the flour in two batches to avoid overdoing it, and resist the urge to stir like you’re trying to win a baking contest.
- BAKE AT 350°F, NOT HIGHER: Apple pie cake needs a slow rise to keep the apples soft and the crust tender. Cranking the oven to 375°F will burn the top before the center sets. If your oven runs hot, reduce the temp to 325°F and check for doneness at 30 minutes—use a toothpick, not time, as your guide.
Make-ahead tips for this recipe
Prep Ahead Strategy
Start by making the crust the night before—it keeps beautifully in the fridge for up to 3 days. Press it into your pans, wrap tightly in plastic, and chill.
This saves you from last-minute prep on baking day. I like to label them with masking tape so I don’t forget which is which. 💡
Filling Prep
Peel and slice the apples 1 day ahead and store them in a bowl with 2 tbsp lemon juice (to prevent browning) in the fridge. When ready to bake, toss them with the cinnamon and sugar right before assembling. This keeps them crisp and fresh-tasting. 🍎
Custard Shortcut
Make the custard mixture 24 hours in advance and store it in an airtight container in the fridge. When you're ready to bake, simply reheat it gently on the stovetop until warm and smooth. This saves time and ensures the custard is perfectly thick when poured. 🥛
Partial Assembly
Assemble the entire cake 1 day before baking—just skip the custard layer. Wrap it tightly in plastic and refrigerate. When you're ready to bake, simply add the custard and bake as directed. This is my favorite time-saver for busy weekends. 📅
Freezing Options
For long-term storage, freeze the assembled cake without the custard for up to 1 month. Thaw it overnight in the fridge, then add the custard and bake fresh.
The texture stays perfect—no freezer burn or soggy crust here. Just let it sit at room temperature for 30 minutes before baking. ❄️
Make-Ahead Serving
Slice the cake 2 hours before serving and store the pieces in a single layer on a tray lined with parchment paper. Cover loosely with plastic wrap to keep them moist.
Reheat individual slices in the oven at 350°F for 5-7 minutes for that warm, gooey texture. This works great for potlucks or family gatherings! 🍽️
Nutrition facts
Frequently asked questions
Can I substitute tart apples for sweet apples in this recipe?
Tart apples like Granny Smith work beautifully—they hold their shape better and add a nice balance to the sweet cinnamon filling. Just reduce the brown sugar to 0.35 cup to prevent an overly sweet flavor. The acidity in tart apples also helps tenderize them faster during baking.
Why does my crust turn soggy instead of staying crisp?
This usually happens if the apples release too much moisture or the custard isn't fully set before slicing. Pre-bake your crusts for 12 minutes before adding filling, and let the cake cool completely (1 hour) before slicing. Chill the assembled cake in the fridge for 30 minutes before serving to help the crust firm up.
How do I make this recipe gluten-free?
Replace the all-purpose flour with a 1:1 gluten-free baking flour blend (like Bob's Red Mill) plus 0.5 tsp xanthan gum. Use almond flour for the crust instead—mix 2 cups almond flour with 0.5 cup melted butter and 0.25 cup sugar. Chill the crusts longer (45 minutes) since almond flour is more fragile. The texture will be slightly denser but still delicious!
Can I bake this in a different-sized pan?
Yes, but adjust baking times accordingly. For an 8-inch pan, reduce all baking times by 10-15% (about 5-7 minutes less per step). For a 10-inch pan, increase times by 10-15%. The key is to check doneness with a toothpick—it should come out clean or with just a few moist crumbs when the cake is done.
What's the secret to getting clean slices?
Let the cake cool completely (2 hours) before slicing, and use a long, sharp serrated knife. Dip the knife in hot water, wipe dry, and slice straight down without twisting. For extra clean cuts, chill the cake in the fridge for 30 minutes before slicing. The custard layer will hold together better when cold.