
Desserts
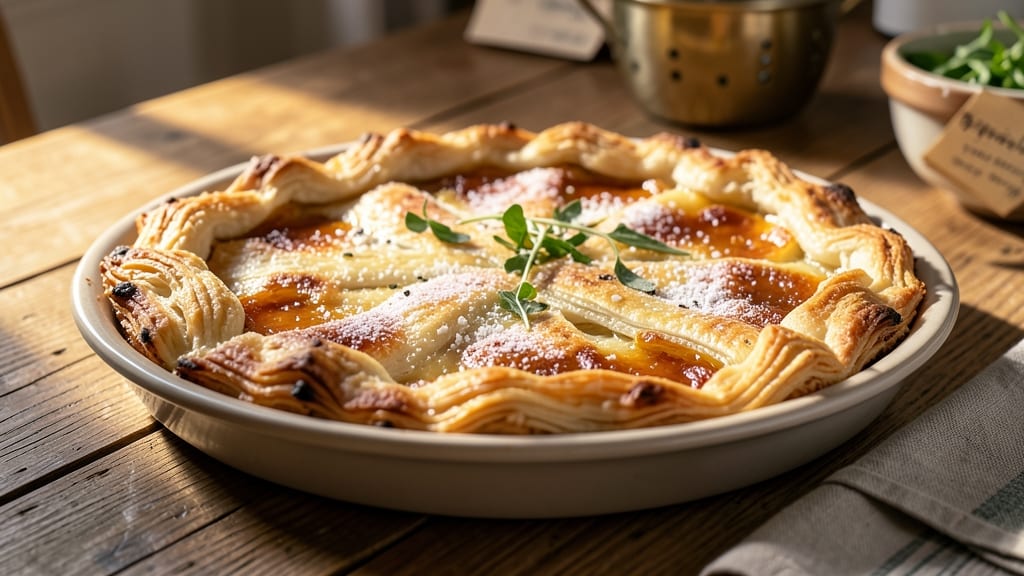
This Amish flaky pie crust recipe delivers the kind of shatterproof, golden layers that make every slice worth the wait. ✨ The secret lies in cold butter folded into the dough in thin sheets—each layer creates those signature flakes that separate cleanly from the fork.
I've perfected this technique over years of baking, and it works for both sweet pies and savory tarts. What sets this crust apart is the foolproof method of keeping butter cold and handling the dough gently. No food processor needed—just a rolling pin and patience.
The result? A crust so crisp it stands up to juicy fillings without getting soggy, yet tender enough to melt in your mouth when you take that first bite.
The magic happens when you fold the butter into the dough like a letter, creating those delicate layers that puff up beautifully in the oven. Whether you're making apple pie, pecan tart, or quiche, this crust forms the perfect foundation.
The key is blind-baking it first—just 15 minutes at 375°F—so it holds its shape under any filling. Once you try this crust, you'll never go back to store-bought. The aroma alone as it bakes will have everyone asking for seconds.
Let's get started on creating your own restaurant-quality crust at home.
Ingredients for amish flaky pie crust
Here's what you need for that legendary Amish flaky pie crust—just five ingredients, no fancy tools.
| Ingredient | Amount | Notes |
|---|---|---|
| All-Purpose Flour 🌾 | 2 ½ cups | Sifted for best texture |
| Unsalted Butter 🧈 | 1 cup | Cold, cubed into 1/4-inch sheets |
| Ice Water ❄️ | ½ cup | Chilled for dough handling |
| Fine Sea Salt 🧂 | ½ tsp | Diamond Crystal preferred |
| Granulated Sugar 🍚 | 1 tbsp | Enhances browning |
The butter is everything—use European-style butter like Plugrá or Land O'Lakes if you can find it. It has higher fat content, which gives you those perfect flakes. Keep it stone-cold the whole time; I even chill my rolling pin in the freezer for 10 minutes before using. The flour? King Arthur or Bob's Red Mill work best—they're finely milled and give a tender crust. If you're in a pinch, any all-purpose flour will do, but avoid bread flour. The sugar and salt are just for flavor and browning, nothing fancy needed here.
No ice water? Freeze a small ice cube tray and use those cubes instead. The dough should be cold and slightly sticky but not wet—if it's too dry, add a splash more water. Want extra flakiness? Fold the butter in like a letter (that's the 'letter fold' technique). No food processor? No problem—this crust is all about hand-folding. The sugar can be swapped for corn syrup or honey if you're making a sweet filling, but for savory pies, keep it simple with the granulated kind.
Wrap the dough tightly in plastic and refrigerate for at least 1 hour—overnight is even better. The butter needs time to set up those layers. Blind-bake for 15 minutes at 375°F with pie weights or dried beans before adding your filling. Leftovers? The dough freezes beautifully for up to 3 months—just thaw in the fridge overnight. And if you're making a double batch, this crust reheats perfectly for that second slice later in the week.
Why You'll Love This Recipe
- No-Fuss Butter Love: The secret’s in the cold butter—cut into flour with a fork, not a food processor. No fussing with dough hooks or waiting for it to rest. Honestly, I’ve made pie crusts that ended up tough; this one stays tender every time because the butter stays chunky and proud.
- Golden Crisp Edge: That first bite? The sugar and salt in the flour give it a subtle sweetness that caramelizes into a crispy lattice. It’s not just flaky—it’s got this addictive crunch that makes you want to eat the crust first. (Yes, even on a Tuesday night.)
- Fills Any Dish: Need a pie? A pot pie? A hand pie for lunch? This crust handles it all—apple, chicken, berries, or even savory fillings. I’ve used the leftovers to make mini tart shells for dessert, and they’re always a hit.
- Budget-Friendly Staple: Five ingredients, none of them fancy. The butter’s the splurge, but a pound lasts forever if you freeze it in discs. Between us, this crust costs half what store-bought does, and it’s always better. Plus, the leftovers keep for days in the fridge—no waste.
Step-by-step instructions for Amish flaky pie crust
Here's how to create that legendary Amish-style flakiness—layer by layer, no shortcuts.
👨🍳 Step 1: Cut the Cold Butter into the Flour
First, sift the 2.5 cups all-purpose flour into a large mixing bowl. This aerates the flour and prevents lumps. Add the 1 cup unsalted butter (still cold from the fridge) and the 1 tablespoon granulated sugar. Using two forks or a pastry cutter, cut the butter into the flour until you have pea-sized crumbs—about 8-10 minutes of vigorous cutting. The butter should look like tiny, uneven marbles scattered throughout the flour.
Here's the thing—don't rush this step. The butter needs to stay cold so it doesn't melt into the flour. If it starts to feel too soft, pop the bowl in the freezer for 5 minutes while you keep cutting. The goal is to create as many butter surfaces as possible—each one will melt and create steam during baking, puffing up those signature flaky layers.
🥘 Step 2: Add Salt and Ice Water Gradually
Sprinkle the 0.5 teaspoon fine sea salt over the flour-butter mixture and toss gently with a fork to distribute. Now for the water: pour the 0.5 cup ice water (yes, ice water—it's crucial) 1 tablespoon at a time while mixing with a fork. Stop mixing as soon as the dough starts to come together. You'll notice it looks shaggy and uneven—that's perfect.
Don't overwork the dough. You want just enough moisture to hold it together when pressed, but not so much that it becomes sticky. If it's too dry, add 1 more teaspoon of ice water. If it's too wet, sprinkle in 1 tablespoon more flour. The dough should hold together when pressed gently but still feel cool to the touch—this ensures those butter layers stay intact.
🔪 Step 3: Shape and Chill the Dough
Turn the dough onto a lightly floured surface and gently shape it into a 1-inch thick disk. Wrap it tightly in plastic wrap and refrigerate for at least 1 hour (I prefer 2 hours for maximum flakiness). This chilling step is non-negotiable—it firms up the butter and relaxes the gluten, making rolling easier and preventing shrinking in the oven.
While it chills, here's a pro tip: place a second disk of dough (if making a double crust) on top of the first, separated by parchment paper. This creates an even thickness when rolled. The cold dough is fragile, so handle it gently—press rather than fold when shaping. You're building layers here, not kneading bread.
🍳 Step 4: Roll and Transfer to the Pie Dish
Remove the dough from the fridge and place it on a lightly floured surface. Using a rolling pin, roll it out to 1/8-inch thickness, keeping it round. If it starts to crack, gently press it back together—don't worry about perfection. Transfer the dough to a 9-inch pie dish by carefully lifting it with the rolling pin and draping it over the dish. Trim any excess dough hanging over the edges.
Here's where it gets tricky: press the dough gently into the pie dish, especially at the bottom and sides. You want it to adhere to the dish but not tear. For a double crust, roll out the second disk and place it over the filling, crimping the edges with a fork to seal. Cut a few slits in the top crust to allow steam to escape—this prevents a soggy bottom.
🔥 Step 5: Blind Bake for Perfect Results
Preheat your oven to 375°F. For a bottom crust, line it with parchment paper and fill with dried beans or pie weights to prevent puffing. Bake for 15 minutes, then remove the weights and bake for another 10-12 minutes until the edges are golden brown and the crust looks dry. For a double crust, bake the filled pie for 45-55 minutes until the crust is deep golden brown and the filling is bubbly.
Watch the color closely—Amish crusts should be golden brown to light brown, not dark. If it starts to brown too quickly, tent it with foil. The key to flakiness is that steam from the butter melting—if the crust bakes too fast, the butter burns instead of creating those beautiful layers. Let the crust cool for 10 minutes before adding filling or serving to prevent sogginess.
Pro Tips For Making Amish Flaky Pie Crust
- Cut Butter in Small Batches: Don’t dump all the butter into the flour at once—work in 2-3 tablespoon chunks while mixing. I learned this the hard way when my first batch turned into a greasy mess because I tried to rush it. Cold butter is stubborn; give it time to incorporate evenly, even if it means scraping the bowl occasionally.
- Use Ice Water Sparingly: This crust relies on just enough water to bind, not drown. Measure your ice water carefully (start with 4-5 tablespoons) and add it gradually—a teaspoon at a time—until the dough just holds together when pressed. Overdoing it makes the crust tough, and trust me, you’ll taste the difference.
- Chill the Dough Twice: First, refrigerate the dough for at least 1 hour after mixing. Then, before rolling, pop it back in the fridge for another 20 minutes. I was skeptical until I tried it—this extra step prevents the butter from melting too soon, guaranteeing those signature flaky layers. (Yes, even if you’re impatient like me.)
- Keep Butter Cold, Not Frozen: Cold butter is your friend, but frozen butter is your enemy. If your kitchen’s warm, chill the butter blocks in the freezer for 10 minutes before cutting. Butter that’s too soft will smear into the flour instead of creating those delicate, crisp layers. Think of it as prepping your butter like you would a steak—handle it with care.
Essential equipment for this dish
Rolling Pin Essentials
The right rolling pin makes all the difference for this delicate dough. I swear by a French-style marble rolling pin—the OXO Good Grips or Lodge Marble—because the cool surface helps keep butter cold while you roll.
Marble stays chilled longer than wood or plastic, preventing the dough from warming too fast. If you don’t have marble, a chilled stainless steel pin works too—just pop it in the freezer for 10 minutes before using. 💡
Pie Dish Selection
Use a 9-inch glass or ceramic pie dish for even baking—metal dishes can over-brown edges. My go-to is a Pyrex pie dish because it distributes heat perfectly and prevents soggy bottoms.
For lattice crusts, opt for a 10-inch dish to accommodate the extra dough. Pro tip: Lightly butter the dish and dust with flour before adding the crust to prevent sticking.
Pie Weights or Substitutes
Blind baking requires weights to prevent puffing. I use Ceramic Pie Weights (like Wilton’s) or dried black beans in a thin layer. Avoid metal weights—they conduct heat too quickly and can burn the crust.
For a quick fix, crumple parchment paper into balls and place them inside. Just ensure they’re evenly distributed to avoid uneven baking.
Pastry Brush & Egg Wash
A high-quality pastry brush (like OXO’s silicone brush) is a game-changer for brushing egg wash or melted butter. For the classic Amish finish, whisk 1 egg yolk + 1 tbsp water and brush lightly before baking.
For extra shine, add 1 tsp honey to the wash. Avoid over-brushing—just enough to seal the edges and add color. 🌟
Plastic Wrap & Storage
Wrap chilled dough tightly in heavy-duty plastic wrap (like Glad Press’n Seal) to prevent drying. For storage, use quart-sized freezer bags—they’re stackable and keep dough cold for up to 3 months.
Label bags with the date to track freshness. When thawing, place dough in the fridge overnight for even results.
Oven Thermometer
Ovens run hot or cold—trust yours with a Thermoworks Oven Thermometer. I’ve seen home ovens off by 25°F! For this crust, aim for 375°F—if your oven runs hot, reduce to 350°F to avoid burning.
The butter’s steam is delicate; precise temperature control ensures those flaky layers rise perfectly. ⚡
Nutrition facts
Frequently asked questions
Why does this crust need ice water instead of regular water?
The ice water keeps the butter cold longer, preventing it from melting too quickly during mixing. Cold butter creates more distinct layers when baked, giving you that signature flaky texture. Plus, the cold water helps the dough stay firm and easier to handle when rolling. Think of it as giving your crust a head start on staying crispy!
Can I make this crust without a food processor?
This recipe is designed to be made by hand using two forks or a pastry cutter. The key is cutting the cold butter into the flour until you get pea-sized crumbs—about 8-10 minutes of work. The hand method actually gives you more control over the butter's temperature and distribution, which is crucial for that perfect flaky texture.
What's the best way to store leftover pie crust?
Wrap the chilled dough tightly in plastic wrap and place it in an airtight container. It'll keep in the fridge for 3 days or in the freezer for up to 3 months. For best results, thaw overnight in the fridge before using. Never thaw at room temperature—it can cause the butter to soften too quickly and ruin those delicate layers.
How do I prevent my crust from shrinking in the oven?
Shrinkage happens when the dough warms up too quickly. Always keep your dough cold until ready to bake, and avoid overworking it. When transferring to the pie dish, gently press it into place rather than stretching it. Also, preheat your oven completely before baking—this helps the crust set up evenly from the start. A properly chilled dough (at least 1 hour) makes all the difference!
Can I use this crust for savory dishes like quiche?
This crust works beautifully for both sweet and savory applications! For quiche, blind-bake the crust as directed, then fill with your egg mixture. The flaky texture holds up perfectly to rich cheese sauces and veggie fillings. Just be sure to pre-bake the crust to prevent a soggy bottom—this crust's structure is ideal for absorbing moisture from wet fillings without losing its crispness.