
Desserts
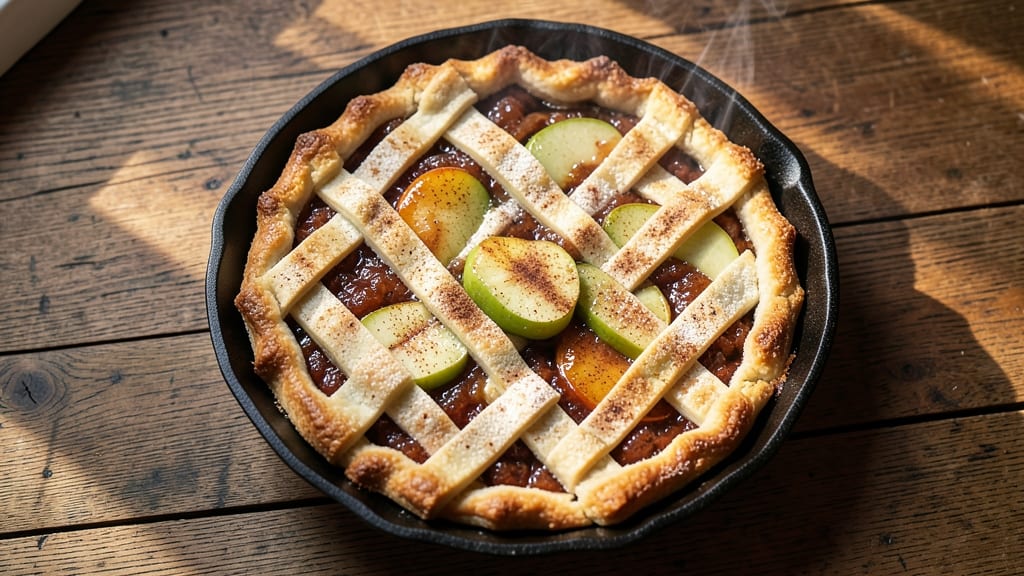
This pioneer apple pie recipe brings frontier ingenuity to your kitchen with a flaky crust that cradles warm, cinnamon-spiced filling—just like the pies that sustained early settlers.
The secret lies in a simple, no-roll crust technique using lard (or butter) that pioneers relied on, plus a filling that balances tart apples with just enough brown sugar and spices to create that signature rustic sweetness.
No fancy equipment needed—just a cast-iron skillet or pie dish, and a little patience for the golden, caramelized edges that make every slice worth the wait.
The crust starts with a mix of flour, lard, and ice water—no butter boxes or pre-made shortcuts here. This method creates flakes so delicate they practically melt in your mouth, a testament to how resourceful early cooks were with limited ingredients.
The filling combines tart apples (like Granny Smith or Jonathan) with cinnamon, nutmeg, and a touch of lemon juice to brighten the flavors, all baked until bubbly and fragrant.
The beauty of this recipe is its adaptability: use whatever apples you have on hand, or swap in a lattice crust for a more decorative finish if you're feeling ambitious.
What you’ll end up with is a pie that tastes like nostalgia—a golden-brown crust with a hint of crispness around the edges, filled with tender apples that release their juices just enough to create a lightly thickened sauce.
The aroma alone will transport you to a covered wagon kitchen, where pies were the centerpiece of any gathering. This isn’t just dessert; it’s a piece of history you can enjoy today, with a few modern twists to make it your own.
Perfect for family dinners, potlucks, or even a cozy weekend project, this pie keeps well for days, making it ideal for meal prep or gifting. The crust holds up beautifully, and the filling continues to improve as it sits, developing deeper flavors over time.
Whether you’re recreating pioneer traditions or simply craving a classic comfort dessert, this recipe delivers on both history and taste—without the fuss.
Ingredients for pioneer apple pie
Flour, lard, and apples—simple ingredients that pioneer cooks relied on for comfort.
| Ingredient | Amount | Notes |
|---|---|---|
| All-Purpose Flour 🌾 | 3 cups | Sifted for flaky texture |
| Lard 🧈 | 1 cup | Or unsalted butter for richer flavor |
| Ice Water 💧 | ½ cup | Chilled for crisp crust |
| Granny Smith Apples 🍎 | 6 medium | Peeled, sliced thin |
| Brown Sugar 🍚 | 1 ½ cups | Packed firmly |
| Ground Cinnamon 🌿 | 2 tbsp | Freshly ground preferred |
| Ground Nutmeg 🌶️ | ½ tsp | Freshly grated for warmth |
| Lemon Juice 🍋 | 2 tbsp | Freshly squeezed |
| Salt 🧂 | ½ tsp | Kosher or sea salt |
| Granulated Sugar 🍚 | ¼ cup | For sprinkling on crust |
| Vanilla Extract 🌸 | 1 tsp | Pure vanilla preferred |
| Cornstarch 🌾 | 1 tbsp | For thicker filling |
The lard is non-negotiable for that classic pioneer flakiness—Armour or Wilson's from the baking aisle works best. Butter fans? Use it, but expect a slightly richer crust. King Arthur flour or any high-protein all-purpose will give you the best rise. Ice water might sound odd, but it keeps the dough from getting gummy. If you're in a pinch, use very cold water from the fridge. For the apples, Granny Smith is ideal (that tart kick balances the sweetness), but Jonathan or Honeycrisp work too—just slice them thin so they cook through without turning to mush.
No lard? Coconut oil or shortening mimics the texture, though the flavor won't be identical. Butter gives a richer taste but less flakiness. Running low on brown sugar? White sugar plus a pinch of molasses gets you close. Fresh nutmeg is worth hunting down—it has way more punch than the pre-ground stuff. The cornstarch is optional but helps thicken the filling if your apples are extra juicy. For a modern twist, add 1/4 tsp cinnamon to the crust dough for extra spice.
This pie tastes even better the next day—3-4 days in the fridge, no problem. Freeze for up to 3 months by wrapping tightly in foil. Reheat slices at 350°F for 10 minutes to revive the crust. I always make a double batch—one for eating, one for gifting. The crust holds up perfectly for shipping, and the filling stays moist. Store leftovers in an airtight container, but honestly? It disappears too fast for that.
Why You'll Love This Recipe
- No-Fuss Dough: I swear by this lard crust—it’s flaky without the fuss of butter, and mixing flour, lard, and ice water takes two minutes. No rolling pins, no stress, just press it into the pan and go.
- Tart-Sweet Magic: Granny Smiths meet brown sugar? That’s the combo that makes this pie dangerously good. The apples stay crisp, the crust stays buttery, and every bite balances sharp with sweet—no cloying aftertaste here.
- Weeknight or Holiday: Honestly, this pie works everywhere. Too lazy for dinner? Serve slices with vanilla ice cream. Hosting Thanksgiving? Make two—one for now, one for leftovers. Even my picky teen devours it.
- Budget Wins Again: Lard instead of butter, pantry staples over fancy fillings—this pie costs next to nothing but tastes like a bakery showstopper. And those leftovers? They last forever reheated or cold.
Step-by-step instructions for pioneer apple pie
Here's how to build a crust so flaky it'll make your guests ask for seconds.
Make the Crust with Cold Ingredients
In a large bowl, combine the 3 cups all-purpose flour and 0.5 teaspoon salt. Cut in the 1 cup lard using a pastry cutter or your fingers until the mixture resembles coarse crumbs with pea-sized fat pieces. This texture is crucial for flaky layers—don't overwork it.
Add the 0.5 cup ice water gradually, mixing just until the dough comes together. The cold water prevents gluten development, which keeps the crust tender. Divide the dough into two equal portions, flatten into discs, wrap in plastic, and refrigerate for at least 1 hour. Chilling firms up the fat for easier rolling and prevents shrinking.
Prepare the Spiced Apple Filling
Peel, core, and slice the 6 medium Granny Smith apples into ¼-inch thick slices. Toss them immediately with 2 tablespoons lemon juice to prevent browning. In a large bowl, combine the sliced apples with the 1.5 cups brown sugar, 2 tablespoons ground cinnamon, 0.5 teaspoon ground nutmeg, and 1 tablespoon cornstarch. Mix gently—you want the spices to coat the apples evenly without crushing them.
Let the filling sit for 15 minutes while you roll out the crust. This resting time allows the juices to release slightly, which helps thicken the filling during baking. The Granny Smith's tartness balances the sweetness perfectly, just like pioneer cooks intended.
Assemble the Pie with Precision
Preheat your oven to 375°F. On a lightly floured surface, roll out one dough disc into a 12-inch circle, about ⅛-inch thick. Transfer it to a 9-inch pie dish, gently pressing it into the bottom and up the sides. Trim any excess dough hanging over the edge. Sprinkle the bottom crust with ¼ cup granulated sugar—this creates a sweet barrier between layers.
Pour the prepared apple filling into the crust, mounding it slightly in the center. Dot the top with 1 teaspoon vanilla extract and press lightly to distribute. Roll out the second dough disc and place it over the filling. Trim and crimp the edges using a fork or your fingers, sealing tightly to prevent filling from leaking.
Bake to Golden Perfection
Cut 4-5 slits in the top crust to allow steam to escape. Place the pie on a baking sheet (to catch any drips) and bake for 50-60 minutes until the crust is deep golden brown and the filling bubbles through the slits. The edges should be crisp, and the filling should be thick enough to hold its shape when gently shaken.
Let the pie cool for at least 2 hours before slicing. This resting period allows the filling to set properly and the juices to redistribute. The contrast between the flaky, buttery crust and the warm, spiced apples makes every bite worth the wait. Serve with vanilla ice cream for the ultimate pioneer-style dessert.
Pro Tips For Making Pioneer Apple Pie
- CHILL THE LARD FIRST: Cold lard makes flaky crusts—no exceptions. Scoop it straight from the fridge and cut it into ½-inch cubes before mixing with flour. I learned this the hard way after a greasy, dense mess from room-temperature lard. Works like butter but with that old-school pioneer texture.
- PEEL THE APPLES (YES, REALLY): Granny Smiths stay tough when cooked, so peel them—even if it feels like extra work. Skip the seeds and cores too; pioneer recipes didn’t waste time with mushy texture. A sharp paring knife and 10 minutes save you from fighting undercooked apple chunks later.
- DON’T OVERWORK THE DOUGH: Handle the dough just until it holds together—no more. Every extra fold or knead tightens the gluten, and that means a tough crust. Press it gently into the pan, then dock it with a fork. Overmixing is the fastest way to ruin a pioneer pie’s signature tender bite.
- USE HOT WATER FOR FILLING: Toss sliced apples with brown sugar and a splash of hot water (not boiling) before baking. The heat softens them faster and caramelizes the sugar right in the oven. I was skeptical until I tried it—now it’s non-negotiable for that deep, jammy flavor.
Pro cooking tips for great pioneer apple pie
Lard vs Butter
Pioneers relied on lard for its high smoke point and flakiness, but modern cooks often reach for unsalted butter instead. If substituting, use 1 cup butter (softened) and add 1-2 tablespoons ice water to compensate for the lower fat content.
Butter creates a richer flavor but less flaky texture—expect slightly denser layers. For a compromise, mix ½ cup lard and ½ cup butter for both flakiness and depth. 🧈
Cold Dough Magic
Never skip chilling the dough! Work with ice-cold ingredients (lard, water, and flour) to prevent gluten from developing. I keep my mixing bowl in the freezer for 10 minutes before starting.
The goal is pea-sized fat pieces—overworking turns the crust tough. For extra insurance, freeze the dough discs for 30 minutes before rolling. This trick saves time and ensures crisp edges.
Apple Prep Secrets
Slice apples ¼-inch thick for even cooking—thicker slices stay tough. Toss immediately with lemon juice to prevent browning while you prep. For a pioneer touch, sprinkle 1 tablespoon cornstarch over the filling before baking.
This creates a glossy finish and prevents soggy bottoms. I also add ½ teaspoon cinnamon to the crust dough for a subtle spice boost throughout every bite. 🍎
Venting for Success
Those 4-5 slits in the top crust aren’t just decorative—they’re essential! Without them, steam builds up and bursts the crust or creates a soggy center. Use a sharp knife to cut ½-inch deep slits in a cross pattern.
For extra drama, brush the top crust with 1 tablespoon melted butter after baking to enhance browning. This step transforms a good pie into a showstopper.
Baking Time Hacks
Bake at 375°F for 50-60 minutes, but watch closely after 45 minutes. The crust is done when it’s deep golden brown with crisp edges. If the top browns too fast, tent with foil.
For a crispier bottom, slide the pie onto a preheated baking sheet halfway through baking. The sheet conducts heat evenly, preventing a pale base. Let it rest 2 hours—this is non-negotiable for clean slices. 🔥
Modern Twists
Want to elevate this classic? Try a lattice crust for visual appeal while keeping the filling moist. For a deep-dish version, use a 9-inch cast-iron skillet and double the crust thickness. Add 1 teaspoon vanilla extract to the filling for depth, or sprinkle toasted pecans on top before baking.
These tweaks keep the pioneer spirit alive while making the pie feel fresh and exciting. ✨
Nutrition facts
Frequently asked questions
Why does this pioneer apple pie crust use lard instead of butter?
Lard creates the signature flaky texture pioneers relied on—its higher fat content produces delicate layers that butter can't match. The fat stays solid at room temperature, preventing the crust from getting greasy. For a modern twist, try a 50/50 mix of lard and butter for both flakiness and richer flavor.
Can I make this pie without a pie dish?
A 9-inch cast-iron skillet works perfectly for deep-dish style, or use a baking sheet lined with parchment paper for a free-form pie. Just add a rim of dough around the edges to contain the filling. Pioneer cooks often used whatever they had—even upside-down pots!
How do I prevent a soggy bottom crust?
Sprinkle ¼ cup granulated sugar between crust layers and pre-bake the bottom crust for 5 minutes before adding filling. For extra insurance, blind-bake the bottom crust (cover with pie weights or dried beans) for 10 minutes at 375°F. This creates a barrier that keeps the filling's juices from steaming the crust.
What if I don't have Granny Smith apples?
Use Jonathan, Honeycrisp, or Braeburn apples—they hold their shape well. For sweeter varieties like Gala, reduce brown sugar to 1 cup and add 1 extra tablespoon lemon juice to balance flavors. Tartness is key to preventing a mushy filling.
Can I make this pie ahead of time?
This pie actually tastes better the next day! Store it in an airtight container for up to 4 days—the flavors deepen as it sits. For freezing, wrap tightly in foil and freeze for up to 3 months. Thaw overnight in the fridge before reheating slices at 350°F for 10 minutes to revive the crust.