
Desserts
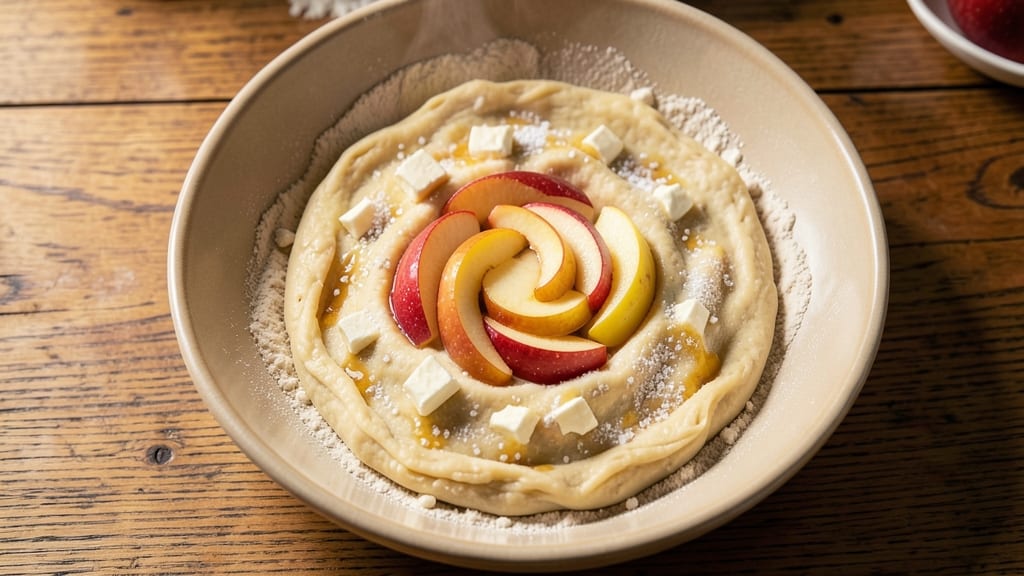
This apple hand pie dough recipe delivers the perfect balance of flaky, buttery layers and tender spiced apples—all in a handheld format that’s as charming as it is delicious.
The secret lies in a simple, foolproof dough that comes together in just 15 minutes, with cold butter cut into the flour for maximum flakiness. I’ve perfected this recipe over years of baking, ensuring every bite delivers that satisfying contrast of crisp crust and warm, spiced filling.
The dough itself is straightforward: flour, cold butter, a touch of salt, and ice water to bind it all. What sets this apart is the technique—keeping everything cold until the last moment prevents the butter from melting prematurely, which guarantees those signature flaky layers you crave.
Once baked, the crust turns golden and tender, while the spiced apple filling caramelizes just enough to create a sticky, aromatic center.
What makes apple hand pies so special is their rustic, handheld appeal—no plates or forks required. Each pie is a little work of art, with a perfectly folded crust that seals in the warm, cinnamon-kissed apples.
The filling is simple but deeply flavorful: apples tossed with sugar, cinnamon, and a splash of lemon juice, baked until tender yet still holding its shape. It’s the kind of dessert that feels both nostalgic and refined.
These pies are ideal for potlucks, holiday gatherings, or a cozy weekend treat. The dough can be made ahead and chilled, while the filling comes together in minutes.
Once baked, they stay fresh for days, making them perfect for meal prep or gifting. Let’s get started on creating your own batch of these irresistible handheld delights.
Ingredients for apple hand pie dough
Here's everything you need for flaky, buttery apple hand pie dough that comes together fast.
| Ingredient | Amount | Notes |
|---|---|---|
| All-Purpose Flour 🌾 | 3 cups | Sifted for light texture |
| Unsalted Butter 🧈 | 1 cup | Cold, cubed for flakiness |
| Granulated Sugar 🍚 | ¼ cup | For dough sweetness |
| Salt 🧂 | ½ tsp | Fine sea salt preferred |
| Ice Water 💧 | ½ cup | Chilled for binding |
| Apples 🍎 | 4 medium | Peeled, cored, diced |
| Granulated Sugar 🍚 | ½ cup | For filling sweetness |
| Ground Cinnamon 🌿 | 1 ½ tsp | Freshly ground preferred |
| Lemon Juice 🍋 | 1 tbsp | Freshly squeezed |
| Vanilla Extract 🌸 | ½ tsp | Pure vanilla preferred |
| Ground Nutmeg 🌿 | ¼ tsp | Freshly grated for warmth |
| All-Purpose Flour 🌾 | ½ cup | For dusting work surface |
| Egg Wash 🥚 | 1 whole | 1 egg beaten with 1 tbsp water |
The butter is non-negotiable here—use cold, unsalted sticks straight from the fridge. Plugrá or Land O'Lakes are my go-tos, but any brand works if it's cold. Cut it into 1/2-inch cubes and toss them in the flour like you're making a snow globe. The ice water is key too—freeze a cup overnight so it's ready when you are. For the apples, Granny Smith or Honeycrisp hold up best to baking. If you're in a rush, pre-peeled and cored apples from the store save time—just dice them yourself for better texture.
No vanilla extract? Vanilla sugar works at double the amount. Short on cinnamon? Pumpkin pie spice at half the quantity gives similar warmth. The dough can be made ahead—wrap it in plastic and chill for up to 2 days, or freeze for 3 months. For extra flakiness, grate the butter into the flour instead of cutting it in. And if your dough feels too dry, add 1 tsp more ice water. The filling can be prepped while the dough rests—just toss the apples with sugar and spices and let them sit at room temp for 10 minutes before filling.
The dough keeps best in the fridge, wrapped tightly—use within 2 days for peak freshness. For the filling, store it separately in an airtight container for 3 days. Once assembled, these pies freeze beautifully—bake from frozen, adding 5-10 minutes to the time. I always make a double batch because they disappear fast. Leftovers? Reheat at 350°F for 10 minutes to restore that golden crust.
Why You'll Love This Recipe
- No-Fuss Butter Love: I swear by cold butter cut straight into flour—no food processor, no fuss. Those flaky layers? Pure magic with just a fork and a few minutes of pressing.
- Sweet Crispy Magic: That sugar in the dough isn’t just for show—it caramelizes into golden edges while keeping the center tender. Honestly, the first bite makes me pause.
- Picnic or Potluck Star: Wrap it around apples, bake it into tarts, or even twist it into cute little hand pies. It’s my go-to for gatherings because it’s always a hit—no one expects it to be this good.
- Pantry Goldmine: Flour, butter, sugar—ingredients you already own. I make a double batch, freeze half, and pull it out whenever I crave something homemade without the grocery run.
Step-by-step instructions for apple hand pie dough
Here's how to make that perfect flaky crust in record time—no rolling pin required.
Cut and Mix the Cold Butter into Flour
Start by placing the 3 cups all-purpose flour in a large bowl. Add the 0.25 cup granulated sugar and 0.5 teaspoon salt, then whisk together until evenly combined. Cut in the 1 cup cold, cubed unsalted butter using a pastry cutter or your fingers—this is where the magic happens. Work quickly but gently to create pea-sized butter pieces throughout the flour.
I like to use my fingers for this step because it gives me better control. The butter should stay cold and firm—if it starts to melt, pop the bowl in the freezer for 5 minutes to reset. You want those butter cubes to stay intact so they create flaky layers when baked. Once mixed, the dough will look dry and crumbly, but that's exactly how it should be.
Add Ice Water Gradually Until Dough Comes Together
Slowly pour in the 0.5 cup ice water, 1 tablespoon at a time, mixing with a fork or your hands after each addition. The ice water is crucial—it binds the dough without warming the butter. Stop mixing as soon as the dough clumps together when pressed. Overworking it will develop gluten and make the crust tough.
Here's the thing—every bowl of flour absorbs moisture differently. If the dough seems too dry after all the water is added, sprinkle in 1-2 teaspoons more ice water. But don't add too much or your crust will be dense. The dough should hold together when you press it, but still feel slightly crumbly. This texture is perfect for hand pies.
Divide and Shape the Dough for Individual Pies
Lightly dust your work surface with the 0.5 cup all-purpose flour reserved for dusting. Divide the dough into 12 equal portions (about 2 tablespoons each) and roll each into a 3-inch round. I use my hands for this—press gently to flatten, then roll between my palms to create smooth, even circles. Keep the unused dough covered with plastic wrap while you work.
Don't worry if they're not perfect circles—they'll look rustic and homemade. The key is to keep the dough as cold as possible. If it starts to soften, chill it in the fridge for 10 minutes before rolling. Cold dough is much easier to handle and won't shrink as much when baking.
Assemble and Fill the Hand Pies
Preheat your oven to 375°F. In a medium bowl, toss the 4 medium peeled, cored, and diced apples with 0.5 cup granulated sugar, 1.5 teaspoons ground cinnamon, 1 tablespoon lemon juice, 0.5 teaspoon vanilla extract, and 0.25 teaspoon ground nutmeg. Let this mixture sit for 5 minutes while you prepare the crusts.
Place a 2-tablespoon portion of the apple filling in the center of each dough round. Fold the dough over the filling to form a half-moon shape, then press the edges together with your fingers to seal. Brush the tops with the egg wash (1 egg beaten with 1 tablespoon water) for that golden finish. Arrange the pies on a parchment-lined baking sheet, leaving 1 inch between each.
Bake Until Golden Brown and Bubbly
Bake the hand pies for 20-25 minutes until the crusts are golden brown and the filling is bubbling. The edges should look crisp and slightly puffed. Rotate the baking sheet halfway through for even baking. If the crusts brown too quickly, tent them loosely with foil to prevent burning while the filling finishes cooking.
Let the pies cool for 10 minutes before serving—this gives the filling time to set slightly and the crusts to firm up. The perfect hand pie should have a flaky, crisp crust that shatters slightly when you bite in, with warm, spiced apple filling that's just tender enough. Serve with vanilla ice cream or whipped cream for the ultimate treat!
Pro Tips For Making Apple Hand Pie Dough
- Chill the Butter First: I learned this the hard way—cutting cold butter into flour at room temperature makes the dough fight you. Pop that butter in the freezer for 15 minutes before starting, or even better, grate it frozen. The smaller pieces melt faster but still keep the dough tender, not greasy.
- Use Ice Water Sparingly: Sounds weird, but it works: measure your ice water after mixing the dry ingredients. Start with 3 tablespoons, then add 1 more if the dough feels too dry. Too much water = tough crust. (Yes, even if you're impatient like me.)
- Skip the Overmixing: The moment the dough starts to come together, stop. I used to worry about uneven crumbles, but that’s how you get tough pastry. Just press it into a disc, wrap it, and rest—no need to "fix" it. The gluten will relax on its own.
- Work Fast with Cold Dough: Cold dough is stubborn, so don’t let it warm up. If your kitchen’s hot, chill the dough between handling and rolling. I keep a damp towel over it while I shape the pie—saves time and keeps the butter from turning the dough into a greasy mess. (Your future self will thank you.)
Health benefits of apple hand pie dough
Whole Grain Boost
Swap ½ cup of the all-purpose flour for whole wheat pastry flour to add fiber and nutrients without sacrificing flakiness. The extra fiber helps regulate blood sugar, making these hand pies a slightly more balanced treat.
I recommend King Arthur Whole Wheat Pastry Flour—it blends seamlessly and keeps the texture tender. 🌾
Lower Sugar Option
Cut the filling sugar from ½ cup to ⅓ cup and boost the cinnamon to 2 teaspoons for a lighter, less sweet version. Add 1 tablespoon maple syrup to maintain moisture while reducing refined sugar.
This keeps the flavor complex while making the pies more diet-friendly. Perfect for those watching sugar intake!
Protein-Packed Crust
For a protein boost, replace ¼ cup of the flour with ¼ cup vital wheat gluten or almond flour. The gluten adds structure while increasing protein content—great for those following gluten-free or high-protein diets.
The texture remains flaky, but the crust will hold its shape better. Just be sure to keep everything cold! 💪
Heart-Healthy Fats
Use ½ cup olive oil instead of butter for a heart-healthier crust. The dough will still be flaky, but with monounsaturated fats that support cholesterol levels. I recommend extra-virgin olive oil for a subtle fruity note.
Pair it with avocado oil for a neutral flavor if you prefer. The crust will be slightly softer but just as delicious!
Antioxidant-Rich Filling
Add 1 teaspoon ground flaxseed or chia seeds to the filling for an omega-3 boost. These seeds also thicken the filling naturally, reducing the need for extra sugar.
Plus, they add a subtle nutty depth that complements the apples beautifully. A sprinkle of walnuts on top adds crunch and extra antioxidants. 🌿
Digestive Benefits
Toss the diced apples with 1 teaspoon psyllium husk powder before baking to add soluble fiber. This helps digestion and keeps the filling from getting too watery.
The husk dissolves during baking, leaving no texture behind. It’s a secret trick I picked up from my grandmother—she swore by it for keeping pies tender! 💛
Nutrition facts
Frequently asked questions
Why does my hand pie dough keep sticking to my hands?
The dough may be too warm or you're not using enough flour for dusting. Always keep the dough cold—chill it for 10 minutes if needed—and work on a surface dusted with 0.5 cup flour. Use your fingertips to press the dough rather than squeezing it, which releases less moisture.
Can I make the dough ahead of time?
Wrap the dough tightly in plastic wrap and refrigerate for up to 2 days, or freeze for 3 months. Let it sit at room temperature for 15 minutes before rolling to make it easier to handle. The filling can also be prepped in advance and stored separately in an airtight container.
What's the best way to seal the edges of my hand pies?
Press the edges firmly with your fingertips to create a tight seal, then use a fork to crimp them for extra security. Brush the edges with a little egg wash before baking to help them set. If the edges open slightly during baking, don't worry—just press them back together gently after removing from the oven.
Can I use frozen apples instead of fresh?
Yes, but thaw and drain them first to remove excess moisture. Frozen apples work best in this recipe because they're often pre-peeled and cored. Pat them completely dry before tossing with the spices to prevent a soggy crust. For best results, use Granny Smith or Honeycrisp varieties.
Why did my crust turn out tough instead of flaky?
Overworking the dough or using warm butter are the most common causes. Keep everything cold, mix just until the dough comes together, and avoid kneading. Also,